

Apollo 7700 Spray Gun Cleaning Guide

Cleaning Your Apollo Spray 7700 AtomiZer® Spray Gun
After you have finished spraying, follow these simple steps to clean your Apollo spray gun:
It is good to keep track of your spray gun usage and maintenance. You can use a log to keep track of both on one sheet. Use and Maintenance Log
Partial Cleaning
Cleaning your 7700 AtomiZer spray gun does not have to be a difficult task. Often, when spraying a variety of clear coatings, a thorough rinsing and wiping of basic parts is all that may be necessary. The basic steps below are for simple and easy cleaning of your Apollo 7700 AtomiZer spray gun.
- Empty any unused material (paint) from the cup and wash out any residue with an appropriate cleaner compatible with the coating or water if using water-based material. Partially fill the cup with cleaner and spray through the gun to flush out the material passages.
- Remove the Air Cap (#3) and clean. Ensure that all the air holes in the air cap are clean.
- Using a brush and solvent, remove any paint deposits on the outer surface of the tip/nozzle (#4). (Apollo FS1900 cleaning brush kit recommended).
- Unscrew and remove the Material Adjustment Screw (#20).
- Remove the needle spring (#21).
- Pull the trigger and then pull the needle (#22) out through the back of the spray gun.
- Remove the fluid nozzle (#4) with the wrench (spanner) provided.
- Clean both fluid nozzle and needle assembly using cleaner or water and a brush.
- Reassemble following the instructions in the next section for thorough cleaning. Make sure to oil the needle spring (#21), the Air Valve Stem (#15) and the Gland Nut (#24) to prevent the needle from sticking.
- To adjust the Gland nut (#24) tighten until the needle sticks, then back off the nut about 1/8 turn. Do not over tighten the gland nut or the needle will stick. Do not under tighten or the Gland Seal will leak.
- Check the Cup Top Gasket and replace if damaged. Always seat the cup top gasket flat in the cup groove. Failure to do this will allow the cup to drip and impair the spray pattern due to loss of cup pressure.
NOTE: When reassembling your spray gun, do not tighten down the Air Cap Ring (#1). This will ensure that if there is any material residue on the threads it will not dry and seal itself to the Air Distributor (#7).
Thorough Cleaning
Follow the steps above for partial cleaning.
To further disassemble the spray gun now that you have already removed the air cap ring (#1), air cap (#3), fluid nozzle (#4) and needle (#22), locate the air cap seal (#5). Lay the spray gun on its side to remove the air cap seal.
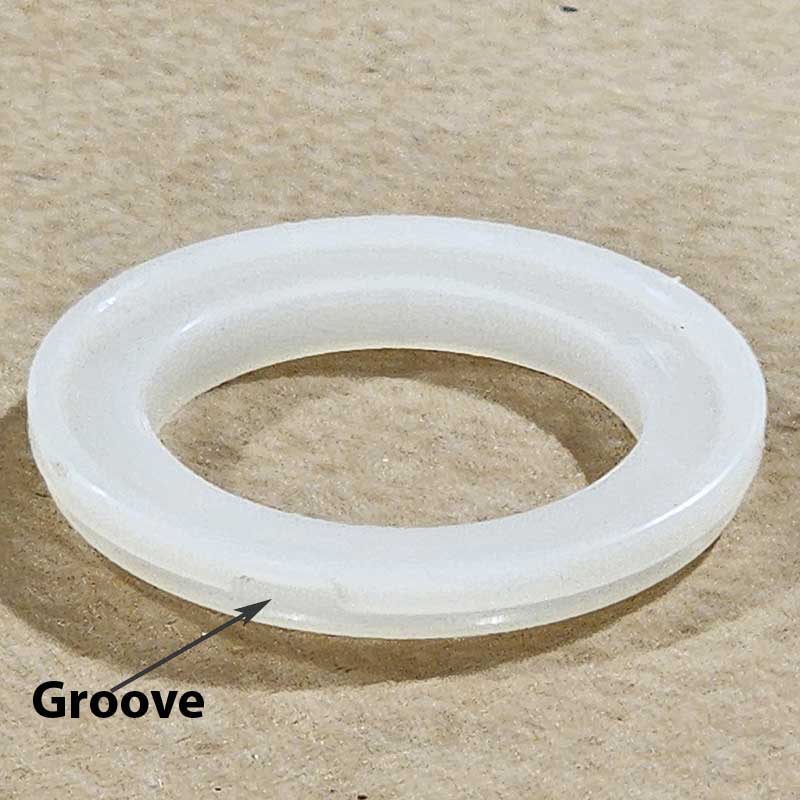
- Locate the small groove on the air cap seal. You can rotate the groove to a comfortable position for removal. (3 o’clock or 9 o’clock).
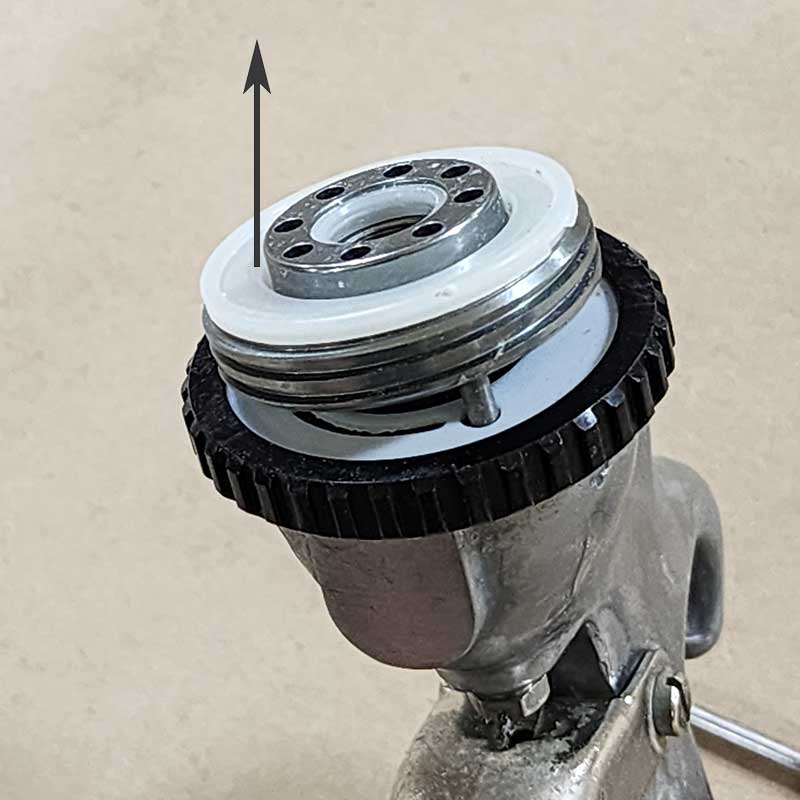
- Place the flat tip of the wrench (spanner) in the air cap seal groove. Push in and pry up until the air cap seal pops out. (Clean if necessary).
- Remove the air distributor (#7) and clean if necessary.
- Remove the fan adjustment ring (#9) and air distributor plate (#8). The air distributor plate is attached to the ring. These two pieces are separate. Clean them both if necessary.
- Note: Make sure you reassemble the two pieces correctly or you will only get a round fan pattern.
- Remove the fan adjustment seal (#10). Clean if necessary.
Re-Assemble The Spray Gun
- Insert the fan adjustment seal (#10).
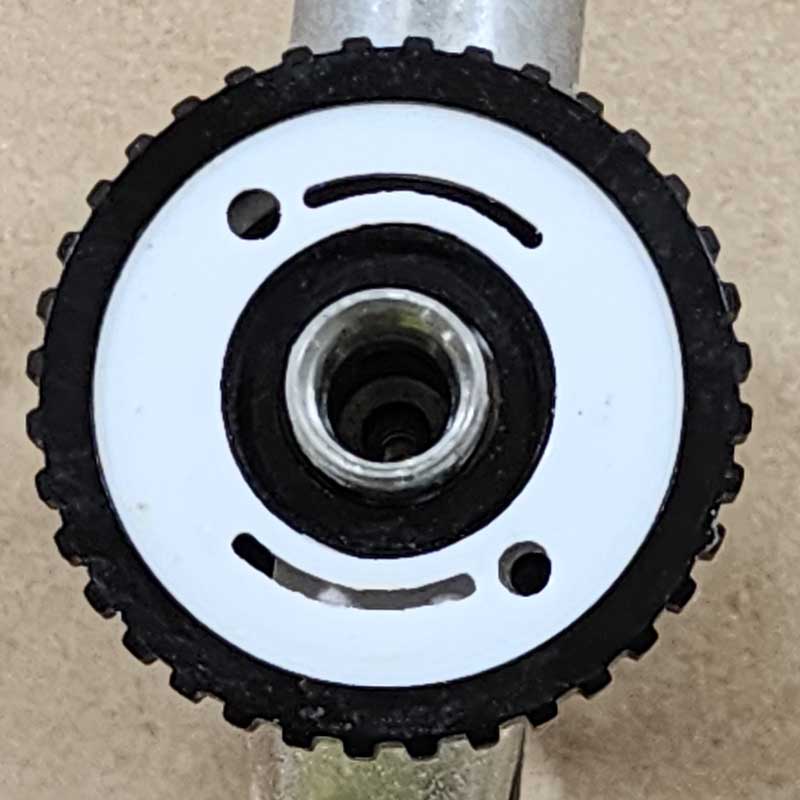
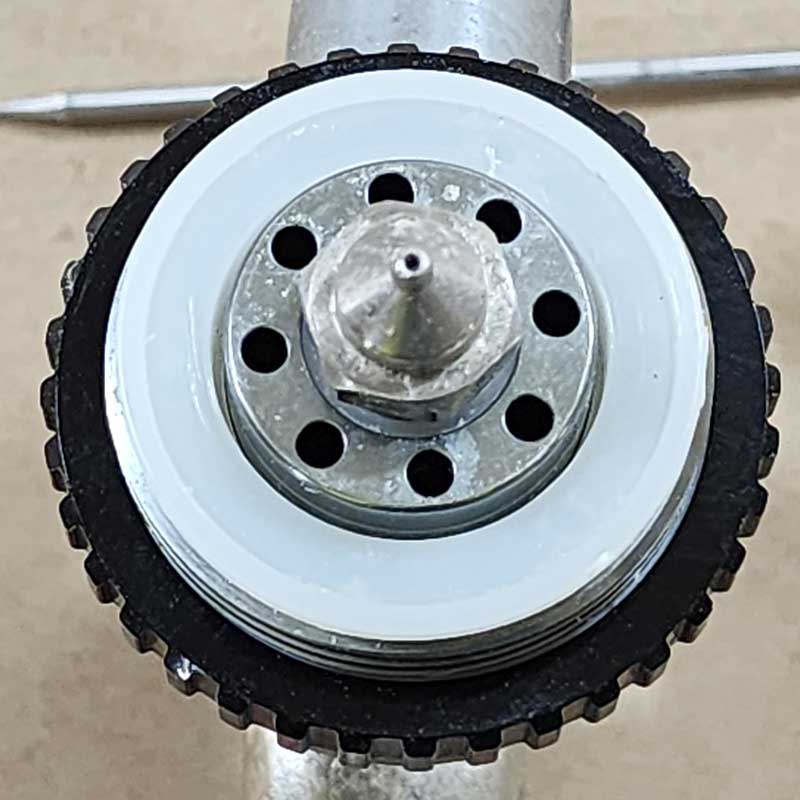
- Insert the fan adjustment ring and air distributor plate. (#8 and #9). If you have separated these two pieces, it is critical that the white air distributor plate is correctly re-inserted into the fan adjustment ring. Note that the open slots on the air distributor plate must be visible through the holes of the fan adjustment ring at the 12 and 6 o’clock positions.
- Using the back end of the needle, move the distributor plate so that the round hole is at the 5 o’clock position. DO NOT put the distributor plate and fan adjustment ring together as show in the picture marked “incorrect”. You will only be able to achieve a round spray pattern.
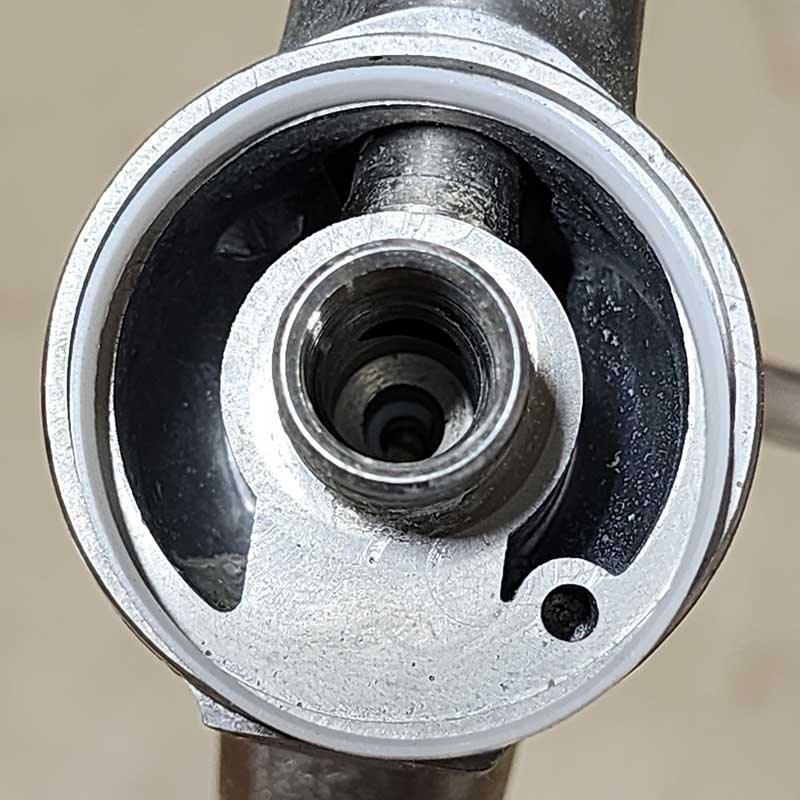
- Place the Air Distributor onto the body of the spray gun aligning the pin with the hole in the spray gun body at the 5 o’clock position.
- Screw the fluid nozzle (#4) back onto the spray gun, finger tight. Rotate the fan adjustment ring to be sure it rotates freely and easily. Tighten the nozzle slightly more with the wrench (spanner). Rotate the fan adjustment ring again. Do not over tighten the fluid nozzle as it will stop the fan adjustment ring from rotating. If too tight, back off slightly. Be sure that the fluid nozzle is not too loose, or leaking will occur.
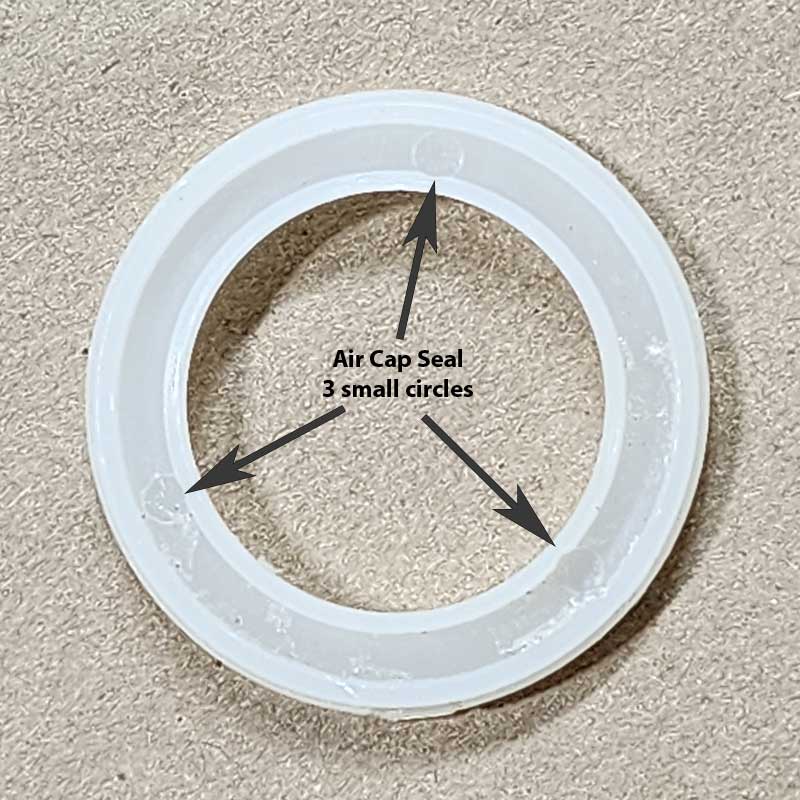
- Insert the air cap seal (#5). To insert, observe both sides of the seal. One side should have three small circles. This side goes toward the spray gun. Snap the air cap seal onto the air distributor (#7).
- Push the needle (#22) back into the spray gun.
- Insert the Needle spring into the Material Adjustment Screw (#20).
- Install the Material Adjustment Screw with Needle Spring (#21).
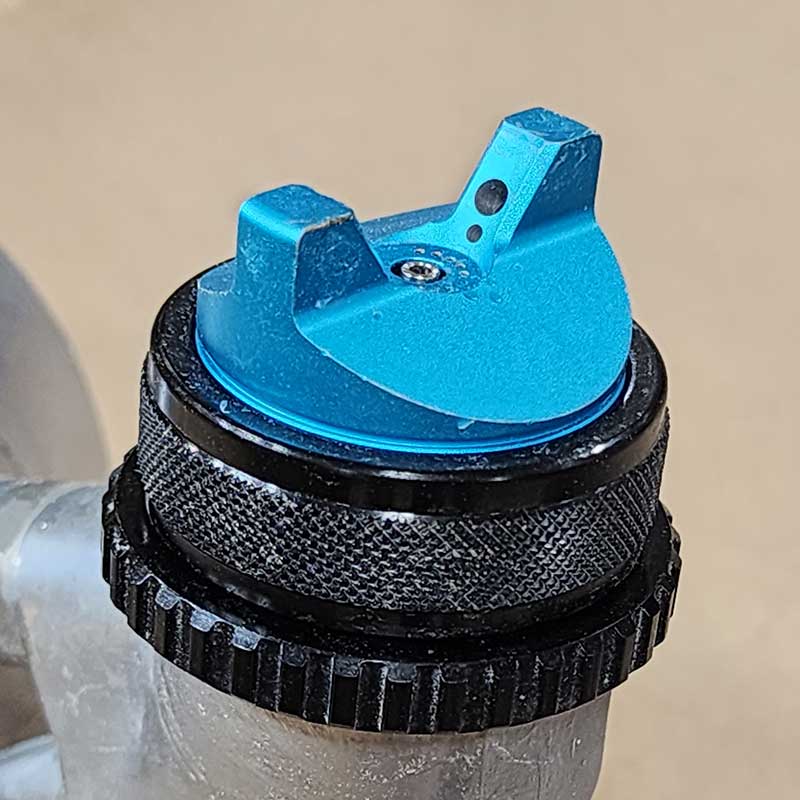
- Install air cap and air cap ring. Spray gun is now re-assembled and ready to use. Periodically, use Apollo lubricant to lubricate the air valve bushing as shown.
- Remove the Material Blanking Cap (#12) from either the gravity or bottom feed port of the spray gun and clean out any material.
- NOTE: When reassembling your spray gun, do not tighten down the Air Cap Ring (#1). This will ensure that if there is any material residue on the threads it will not dry and seal itself to the Air Distributor (#7).










Login and Registration Form